Page 1 of 5

Rich's 328 Compact Project

PostPosted: Sun Nov 10, 2013 10:05 pm
by rally_rich
I have been following this forum for some time now so to start with a big thanks to those that have posted and particuarly in the cars/technical area. The shared information and ideas is a great help. I am from NZ originally and was involved in rallying for many years there helping/servicing for friends. The last few years I have sat in the co-drivers seat on various SV and forest events here in the UK. It's now time to build my own car and this project began a few months ago.

The plan is a 328 Compact for both tarmac and forest events.

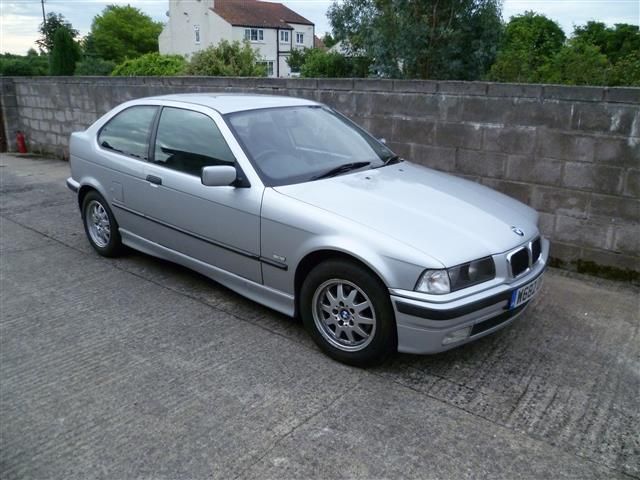
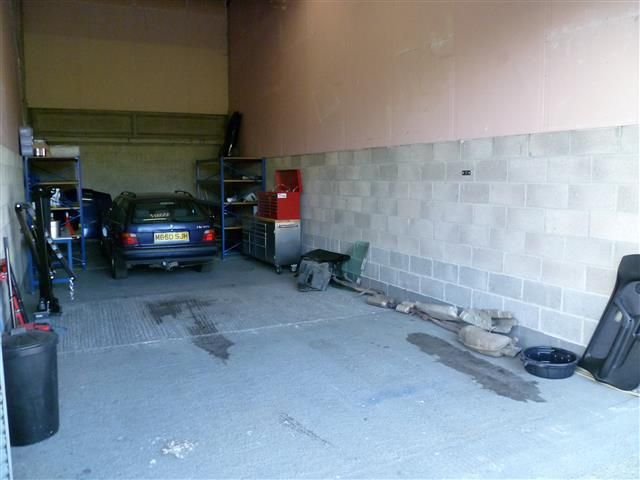
The starting point - a tidy runner that was given one last autotest before the work began.
Image

And this 328 Estate MOT failure for the engine, g/box and anything else useful or common.
Image

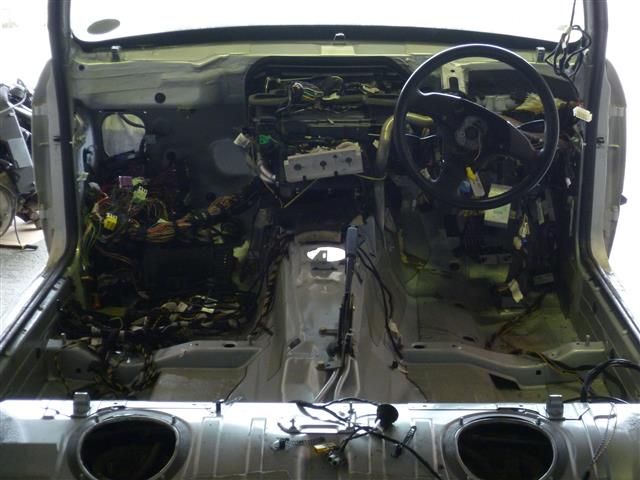
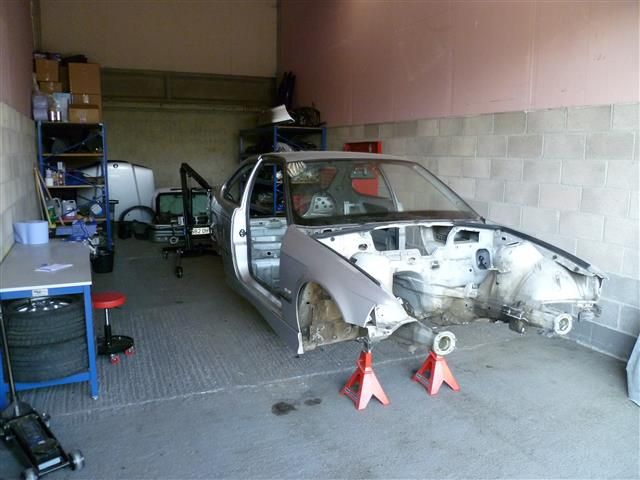
Roll the A-Team theme tune, many long days, a lot of help from friends, takeaway dinners, piles of rubbish and several calls to my helpful scrap metal man and :
Image

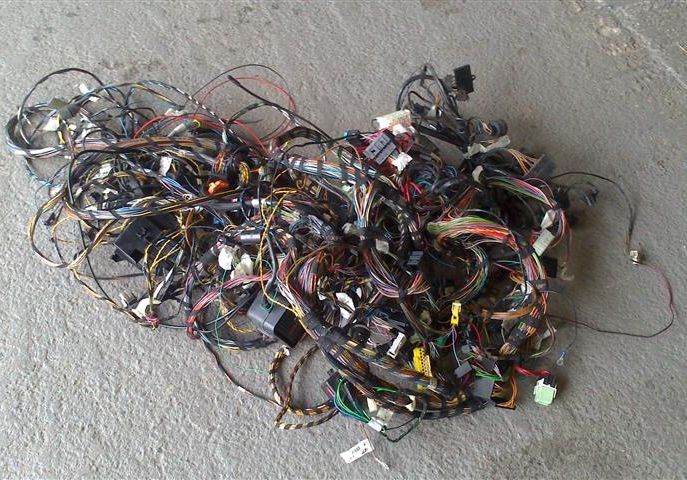
All connections labled.
Image

Image

Re: Rich's 328 Compact Project

PostPosted: Sun Nov 10, 2013 10:26 pm
by rally_rich
Car Dolley
I brought myself a new mig welder so to test it out I decided to fabricate up this car dolley. The dolley makes it really easy to move the car around the workshop or outside to make more space - you can never have enough! I can sit/stand anywhere in the shell and its very stable. It has been really handy so far.

There is a bar that runs under the bell housing that I clamp to with U-bolts.

Image

Re: Rich's 328 Compact Project

PostPosted: Sun Nov 10, 2013 10:41 pm
by rally_rich
'Go Fast' Black
I have done the typical reinforcement of the trailing arms and I fabricated the front strut bodies which all needed painting. I haven't done much spray work before so it was good to practice on bits so I painted anything I could get my hands on in 'go fast' black.

Image

Image

Re: Rich's 328 Compact Project

PostPosted: Sun Nov 10, 2013 10:56 pm
by rally_rich
The Spray Marquee
I rent my workshop on a nearby farm so I needed some means of spray painting inside without making a mess. I brought a 3m x 6m marquee off ebay for £55, new and delivered. It worked better than I imagined. It kept the spray fog completely contained, dust low and was really easy to warm up with a heater. Just no one tell my landlord! :shock:

Image

Image

Re: Rich's 328 Compact Project

PostPosted: Sun Nov 10, 2013 11:25 pm
by rally_rich
GP4 Escort Suspension

I am planning to use Bilstein GP4 Escort type coilover shocks front and rear. It seems to me to be economical way to do it and I can easily swap the tarmac/gravel inserts on the front. They were good enough for Ari Vatenan so they will be just fine for me. For the front I brought the blank strut bodies and fabricated my own brackets. I made a jig off the original strut to match the geometry. On the rear I have offset the top mounting hole by 18mm outboard so the spring clears the original turret. When I get it all assembled I will take some more photos and update how its worked out.

Image

Re: Rich's 328 Compact Project

PostPosted: Mon Nov 11, 2013 1:32 pm
by bruvs1
Top job , keep it coming 8)

Re: Rich's 328 Compact Project

PostPosted: Tue Nov 12, 2013 11:35 am
by steve k-b
Looks awesome bro!! keep the photos coming man. (best Kiwi slang I could think of)

Re: Rich's 328 Compact Project

PostPosted: Tue Nov 12, 2013 1:29 pm
by davidc
What a great idea for a "spray booth".........it would certainly save a lot of hassle !!

Keep the pics coming, very interesting !!

Cheers,
David

Re: Rich's 328 Compact Project

PostPosted: Tue Nov 12, 2013 10:41 pm
by Adam Gardner
love the paint oven!

Re: Rich's 328 Compact Project

PostPosted: Mon Feb 10, 2014 1:02 am
by rally_rich
Thanks for the comments guys. A bit of time as passed since my last post but the project has been progressing over winter.

Suspension Cont...
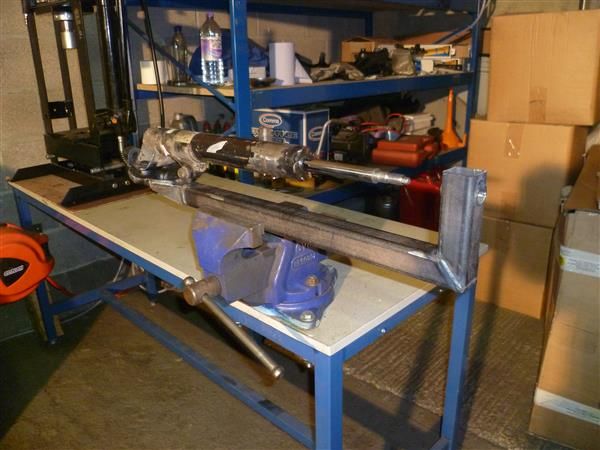
I made a mistake with the first front struts I fabricated. I basically made the strut tube too short from an error in measuring somewhere. In full compression the wheels would foul the upper chassis before the shock absorber would run out of travel. And therefore they were too short in full droop as well. But the strut bodies were salvageable so after putting it off for a while I started again and remade the strut jig as well as I though of a much easier way to do it.

The tube in the right side of the picture is the same size as the sleeve nut at the top of a Bilstein inset so this aligns the geometry.
Image

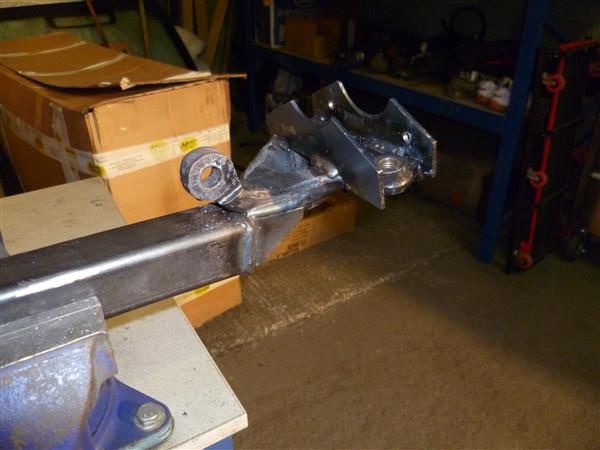
I used a spare hub/spindle for the other end of the jig and welded on some guides to set the alignment of the tube.
Image

I have made a template for drilling/cutting the weld on bits so it is now a reasonably easy process to make the struts.
Image

E46 Front Wishbones
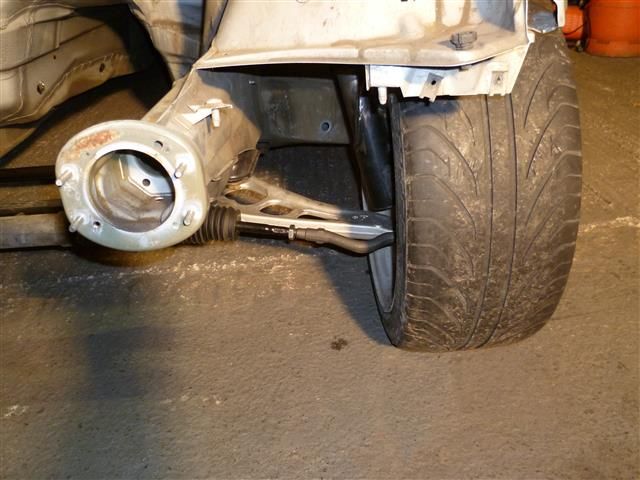
I am using E46 lower arms to increase the track width by ~27mm each side. They fit with no major modifications but beware the Meyle wishbones don't fit as they have a larger outer ball joint that fouls the brake disk. Lemforder ones are close but fine.
Image

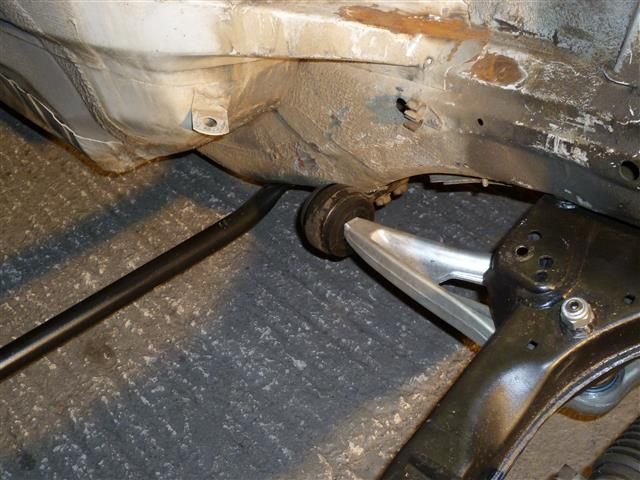
I have used Powerflex E46 (60mm) bushes to fit the original compact lollipops. The wishbones needed a small amount of fettling.
Image

And the Z3 (2.7 turns) steering rack to finish it off.
Image

Top mounts
I made a drawing and had a pair of top mounts machined. The spherical bearing is eccentric by 27mm to match the increased track width. Therefore the camber remains the same nominally. I will adjust the camber with shims on the hubs/spindles.
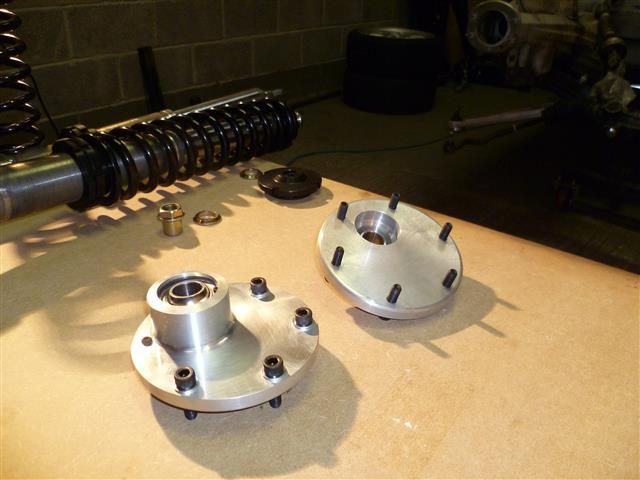
Image

It's tight but I can get a socket in from the top to tighten the top sleeve nut. I may need to grind down a special socket to make life easier. I have also double skinned the strut tops on the inside. I cut the tops out of the donor 328 Estate.
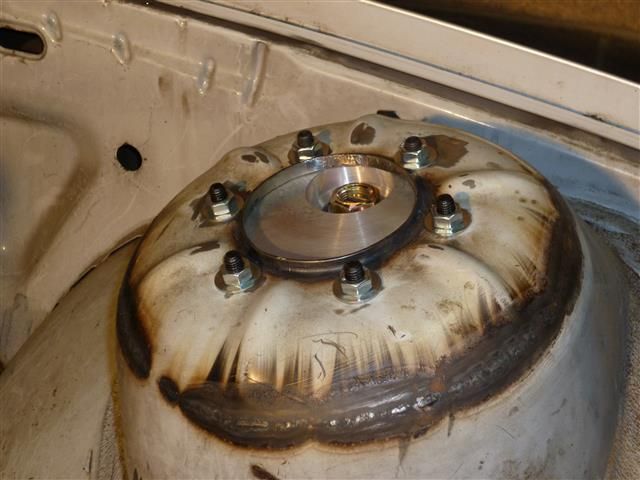
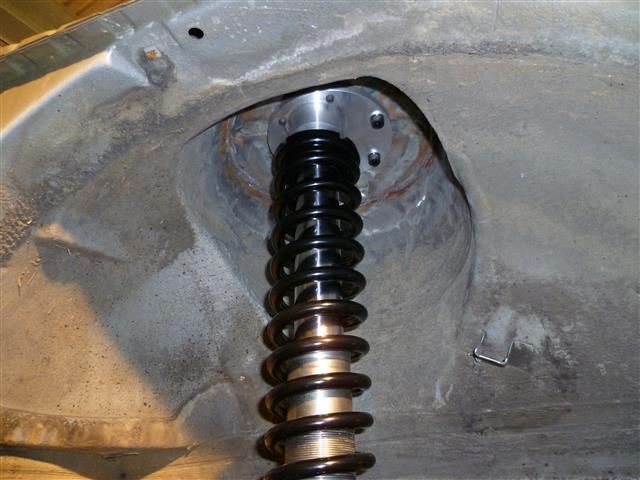
Image

Image

Image

Rear Suspension
As I explained earlier in the post I am using Escort Gp4 type Bilstein coilvers on the rear. The photos below show how I have modified the mounting point to move the top mount 18mm outboard so the spring clears the arch. The underside plate is only tacked in at present.
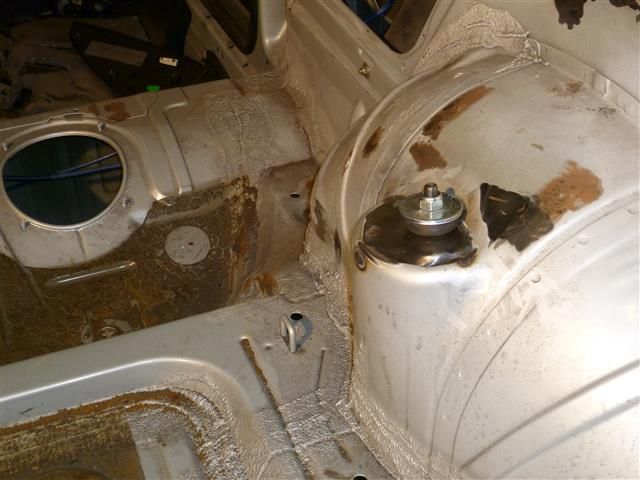
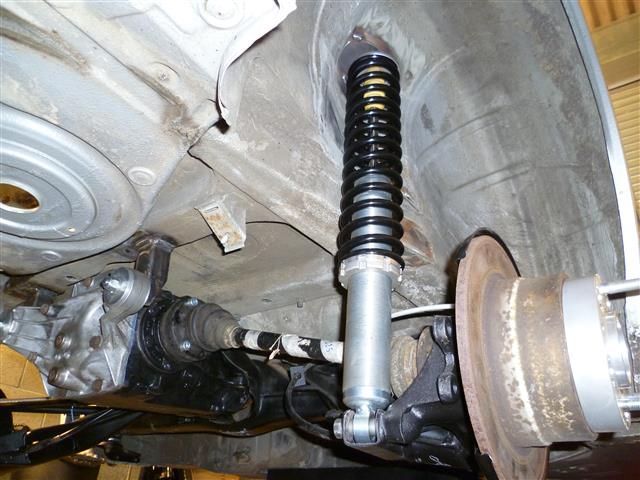
Image

Image

A 4.45 LSD from Lithuania
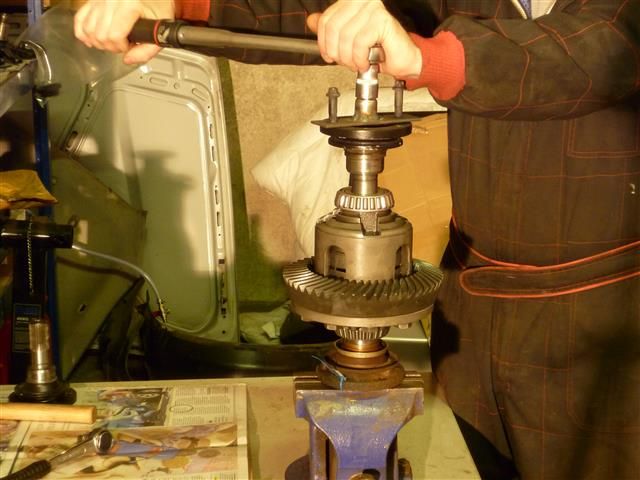
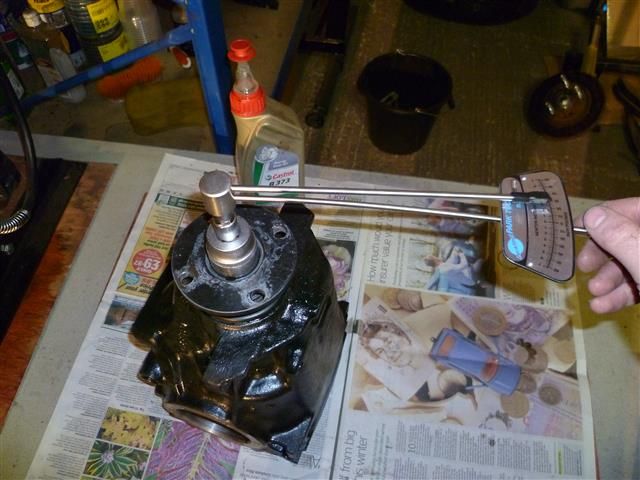
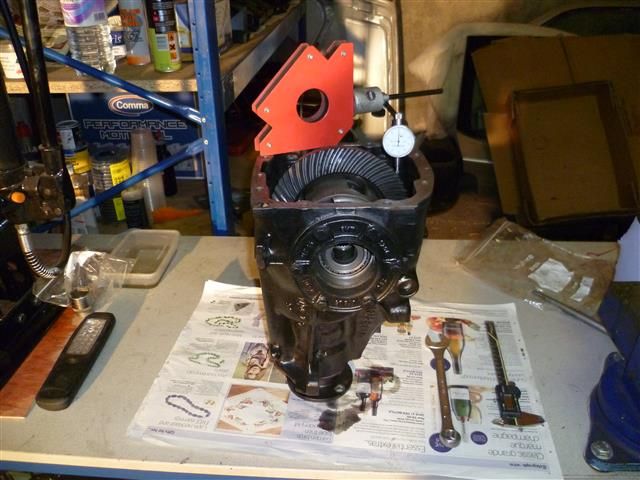
I sourced the medium case LSD and a 4.45 crown wheel and pinion set from the ebay seller az_autoshop in Lithuania. The guy was really helpful and it arrived quite quickly. He seems to stock quite a few spares and I would recommend using him. The casing was pretty poor with rust as they often are but I had it sand blasted and it came up well. I have modified the LSD to take four plates by having the end cap machined (~5mm) and removing the spacer washer. I have retained all the belleville washers. I completed the build with new bearings and seals as well.
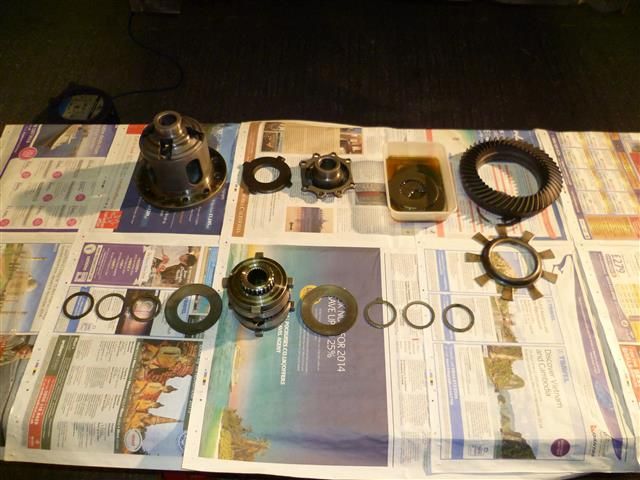
Image

Checking the break away torque.
Image

Setting the pinion preload.
Image

Checking the backlash.
Image

I am going for the twin ear back plate as well.
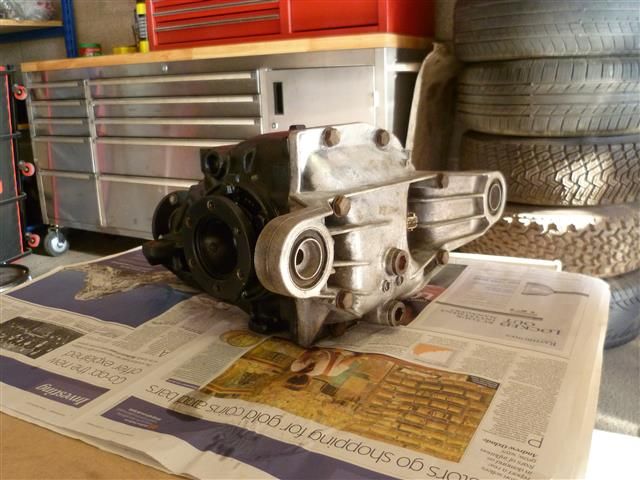
Image

Re: Rich's 328 Compact Project

PostPosted: Mon Feb 10, 2014 1:23 am
by rally_rich
Solid Mounting the Rear End

A friend machined up these mounts for me to solid mount the rear beam and twin ear back plate.
Image

Image

I have welded on attachment points to support the diff.
Image

Engine Mounts

I made jigs like this off the original 328 engine mounts.
Image

and fabricated steel mounts from 45mm roll cage tube and plate.
Image

The mount clears the M3 Evo exhaust headers I am using on the M52B28.
Image

Only a few small jobs to go now... :roll:
Image

Re: Rich's 328 Compact Project

PostPosted: Mon Feb 10, 2014 11:08 pm
by Adam Gardner
looking good! looks like you have been busy making and modding parts.

Re: Rich's 328 Compact Project

PostPosted: Mon Feb 10, 2014 11:33 pm
by is-si
+1, great post - keep up the progress 8)

Re: Rich's 328 Compact Project

PostPosted: Tue Feb 11, 2014 1:33 am
by mrfuzzyfelts
Wow looks great!

As there the 3.0 m3 headers don't forget to weld in a boss for the lamda sensor or 2 if your using both

Re: Rich's 328 Compact Project

PostPosted: Thu Feb 13, 2014 10:20 pm
by rally_rich
Thanks guys. I will take a day off the build this weekend to go and spectate on my local Wyedean.

@ mrfuzzyfelts - The headers are M3.2 Evo so already have both the lamda sensors in place. A really straight forward swap. I got the idea/info off your original post so a big thanks for the shared knowledge. I had a few rusty/seized manifold studs. They are M7 x 1.0 which is a bit of an odd size and seemed hard to find at a reasonable price. I found that Lambrettas and a few of the euro scooters share the same size so I got a few stainless ones from lambrettaspares.com for a quid+vat a piece.